Self-test
v4.0.0
The rescue switcher can test the board and its connection to the computer. This page explains every line of the test, and the soak test.
Table of contents
The self-test
Press T in the list to test the board and its connection to the computer. The test takes a few seconds, then shows one line for each check:
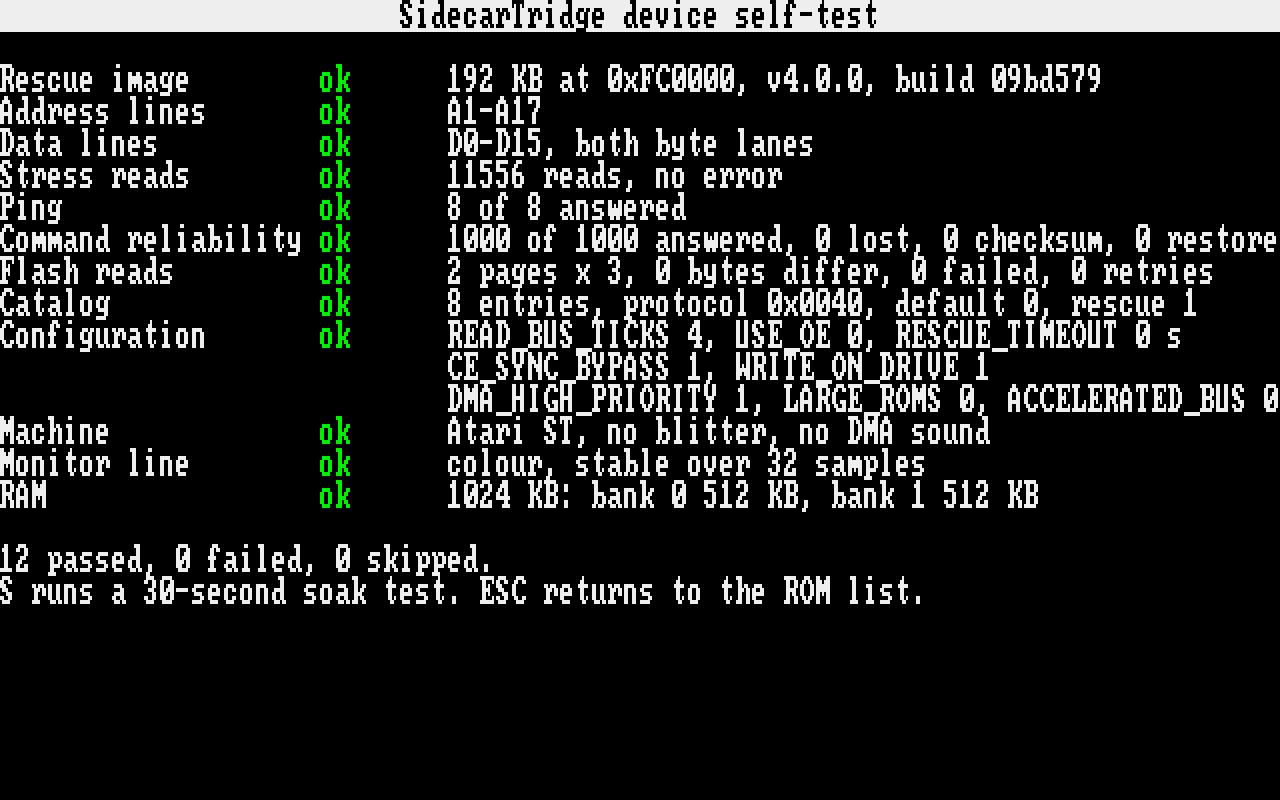
Each line says ok, FAIL or skipped (green, red and white on a colour monitor; all white on a monochrome one), then the details. On a working board every line is ok: 12 passed, 0 failed, 0 skipped, on an Atari and on an Amiga alike.
| # | Line | What it checks | If it fails |
|---|---|---|---|
| 1 | Rescue image | Information: the image, where it runs, its version and build. | |
| 2 | Address lines | Every address line between the computer and the board: A1-A17 on the Atari, A1-A18 on the Amiga. | The lines named “stuck” or “wrong” have a bad contact between the computer’s ROM socket and the board. Check the seating and the pins. |
| 3 | Data lines | Every data line, D0 to D15, in both bytes. | A line stuck at 0 or 1, two lines shorted, or a whole byte missing. On boards with separate high and low ROM sockets, a missing byte points to one socket’s connection. |
| 4 | Stress reads | Thousands of random reads, compared with the image. | Errors name the lines most often wrong: a loose contact or a timing problem. Run the soak test. |
| 5 | Ping | That the board answers commands: 8 of 8. | No answer: the board does not run firmware v4.0.0, or is not well seated. |
| 6 | Command reliability | 1,000 more commands, all answered. | Commands lost: the same causes as above, or a noisy bus. Skipped when the ping got no answer. |
| 7 | Flash reads | The board’s settings and list of images, read 3 more times and compared. | A difference or a failed read. A retry that then succeeds is not a fault. Skipped when the ping got no answer. |
| 8 | Catalog | The board’s list of images: how many, which is the default and the rescue one, the protocol version (0x0040), and that every name is readable and every size between 4 KB and 1 MB. | The list stored on the board is wrong. Connect the board to your computer and eject the ROMEMUL drive: the eject rebuilds it. |
| 9 | Configuration | Information: the settings the board uses, from CONFIG.TXT. | |
| 10 | Machine | Information: the computer, as the test finds it. On the Atari: ST, Mega ST, STE or Mega STE. On the Amiga: its Agnus or Alice chip, PAL or NTSC, and the chip IDs when it reads any. | |
| 11 | Monitor line | Atari only: the monitor-type signal, read 32 times. | “changing” points to the monitor cable or its connector. |
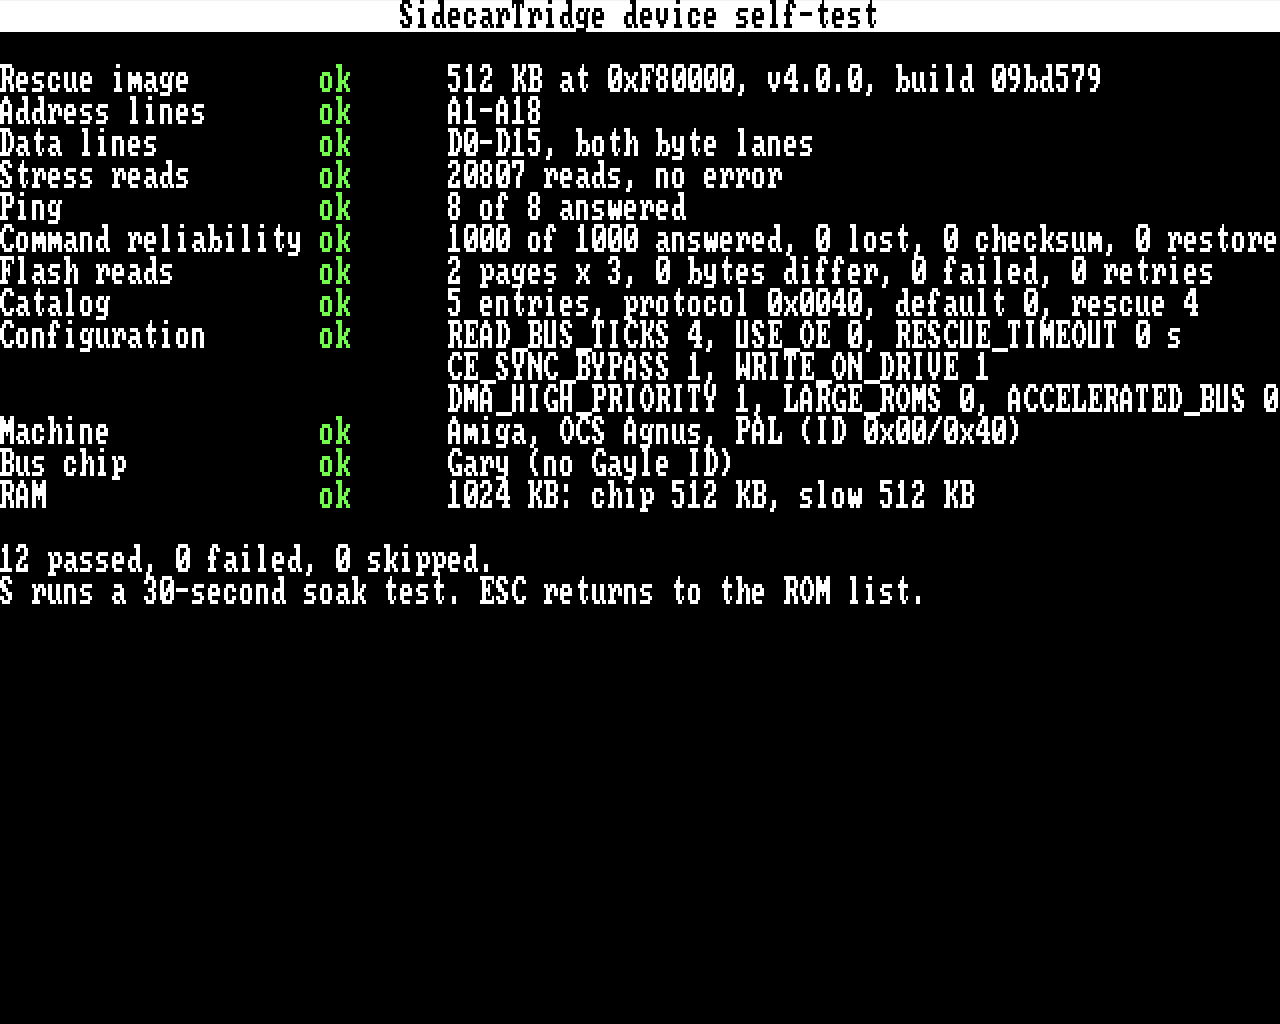
| Bus chip | Amiga only, in place of the monitor line. Information: the chip that decodes the bus. “Gayle (ID 0xD0)” on an Amiga 600; “Gary (no Gayle ID)” on an Amiga 500, 500+ or 2000. | ||
| 12 | RAM | Information: the memory found, by bank on the Atari, chip and slow memory on the Amiga. | Fast memory on an A2000 expansion card is not counted; that is expected. |
On an Amiga the screen is the same, with the bus chip line in place of the monitor line:
The soak test
Press S on the self-test screen to run a 30-second soak test: random reads without a pause, with a line that counts them every second. It ends with ok and the number of reads, or a FAIL that names the lines most often wrong. ESC stops it early.
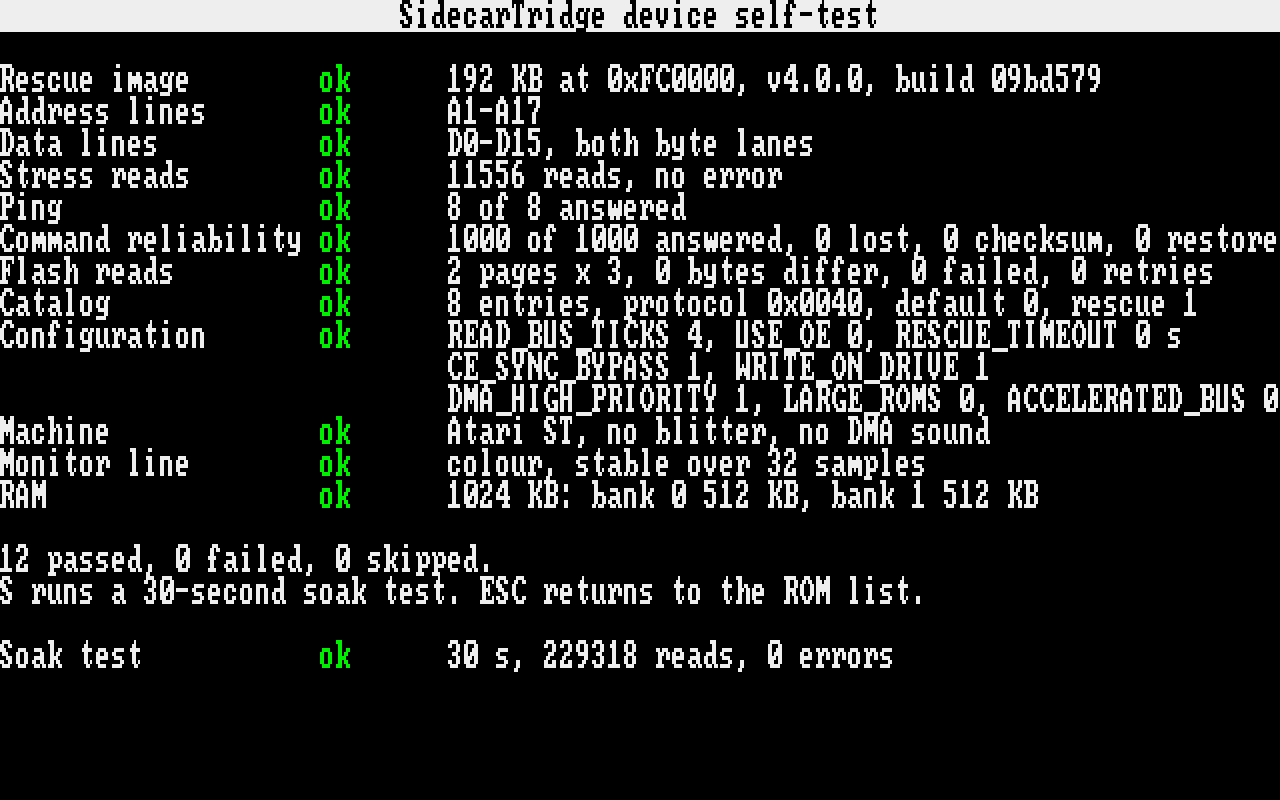
Press S to run it again, or ESC to go back to the list.