Kickstart Multi ROM
The SidecarTridge Kickstart Multi ROM emulates the Kickstart ROM of the Amiga 500, 500+, 600 and 2000: it runs any Kickstart version or custom ROM, such as DiagROM, without swapping chips. It is made of two boards, one on top of the other:
- The carrier board plugs into the Kickstart ROM socket of your Amiga’s motherboard, in place of the original ROM chip. It connects the Amiga to the board above it and sets the OOPS Bug fix for your motherboard. With board revision 4, one carrier board fits the Amiga 500, 500+, 600 and 2000; board revision 3 came with a carrier board for each Amiga 500 or 2000 motherboard.
- The ROM Emulator board sits on top of the carrier board and does the work: it stores your ROM images and serves them to the Amiga. It is the one with the USB-C connector.
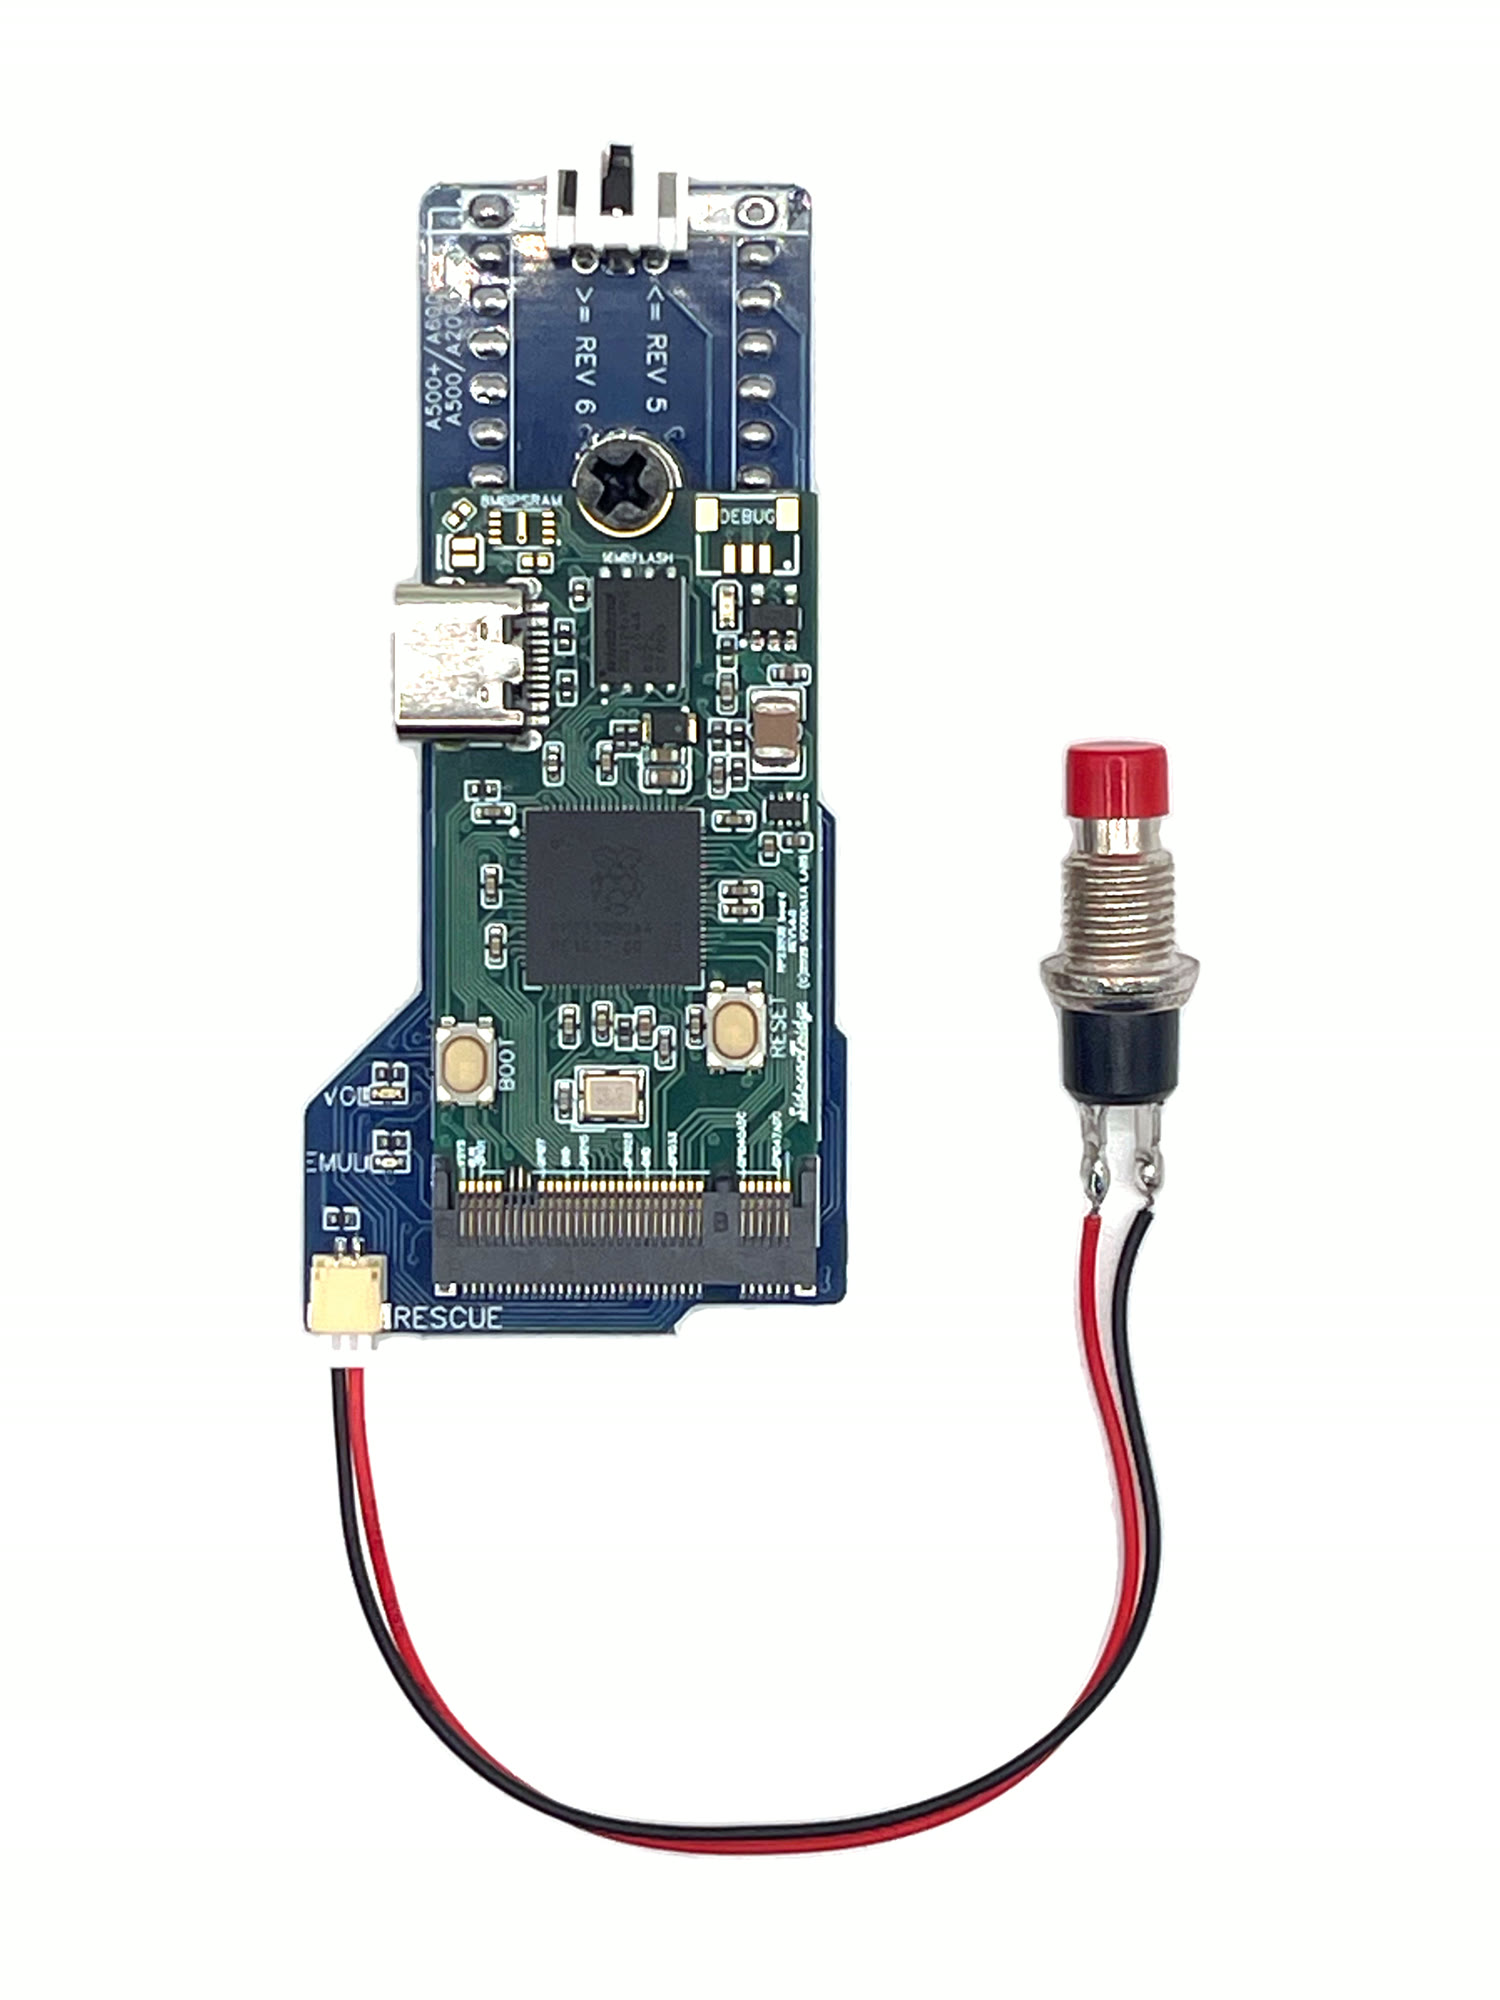
The ROM Emulator board has had two generations, its board revisions, and each one has its own guides. Choose yours to read the right ones.
Which board do I have?
Look at the ROM Emulator board, the smaller board on top of the carrier board, with the USB-C connector. Its board revision is the one that counts: the carrier board does not tell it.
On sale
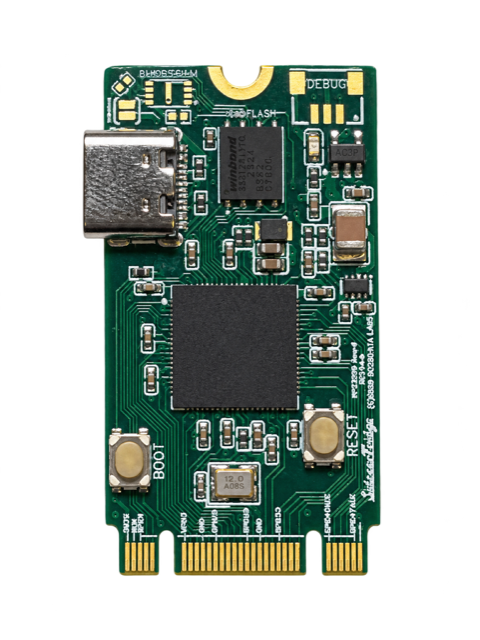
Board revision 4
RP2350B microcontroller, firmware v4.0.0.
- A short card with a gold edge connector along its bottom edge, plugged into the carrier board.
- USB-C connector on its left side.
INFO.TXTon its drive saysBoard variant: RP2350B.
Supported
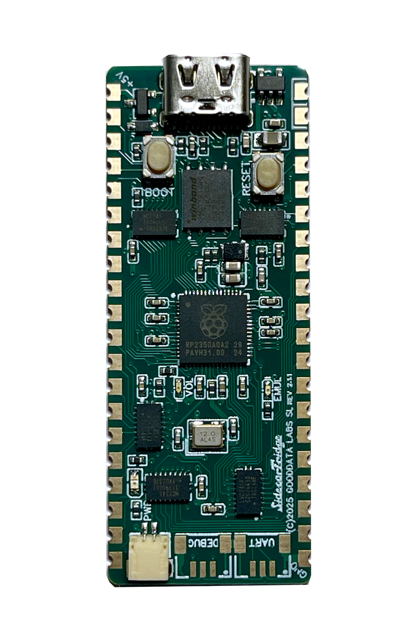
Board revision 3
RP2350A microcontroller, firmware v4.0.0.
- A wider board soldered onto the carrier by castellated pads.
- Red power LED, plus green and orange LEDs.
INFO.TXTon its drive saysBoard variant: RP2350A.
Not sure?
Either of these tells you:
- Look at the ROM Emulator board on top of the carrier board and compare it with the photos above: board revision 4 is a short card plugged into a slot of the carrier board; board revision 3 is soldered onto it.
- Open
INFO.TXTon the USB drive the board shows on your computer.Board variant: RP2350Bis board revision 4;Board variant: RP2350Ais board revision 3.
Firmware: current version and how to update
These guides keep two numbers apart: the board revision is the hardware you have, and the firmware version is the software that runs on it. Neither is an Amiga Kickstart ROM version. Find your board revision first (Which board do I have?), then its row:
| Your board | Current firmware | How to update |
|---|---|---|
| Board revision 4 | v4.0.0 | Install the file with rp2350b in its name: Firmware installation |
| Board revision 3, already on firmware v4.x | v4.0.0 | Install the file with rp2350a in its name: Firmware installation |
| Board revision 3, still on firmware v3.x | v4.0.0 | Replace the SWITCHER and the rescue switcher too: Upgrading to firmware v4.0.0 |
Firmware v4.0.0 goes with SWITCHER 4.0.0 and the rescue switcher 4.0.0. Which firmware is installed? Connect the board to your computer and open INFO.TXT on its ROMEMUL drive: the Version line tells you.
Where to get it: the downloads page, or install it straight from Chrome or Edge at webflash.sidecartridge.com. What changed in each version is in the Changelog.
Never install a firmware v3.x file on board revision 4: it does not check which board it runs on, and it would drive pins that are inputs on that board.
For every board
🛠️ Kickstart ROM Conversion
Convert Amiga Forever Kickstart ROM files for use with the Kickstart Multi ROM.
Archived guides for firmware v3.x, kept for reference: Getting Started (firmware v3.x) and User Guide (firmware v3.x).