Hardware Installation
This chapter explains how to open an Atari ST / STe computer and install the SidecarTridge Croissant Keyboard Emulator.
All ST-family machines use a plastic outer case and internal metal shielding. Both must be removed to access the keyboard connector on the motherboard.
Table of contents
Opening the Atari ST case
Overview
To install Croissant, the plastic case and the internal metal shielding must be removed.
Take your time during this process. The connectors and plastic parts are old and can break if forced.
Tools required
- Phillips screwdriver
- Anti-static wrist strap (recommended)
Safety precautions
Power off and unplug Disconnect the Atari from the mains before opening the case.
Avoid static electricity Use an anti-static wrist strap or touch grounded metal before handling the board.
Work on a clean surface Avoid carpets, dust, or conductive debris.
Step-by-step
Remove the plastic case screws
Turn the Atari upside down and remove all case screws. Keep the screws safe for reassembly.
There are many videos online showing how to open an Atari ST case.
Separate the case halves
Carefully lift the top cover.
Do not force the case. If needed, gently pry the edges using a plastic tool.
Disconnect the keyboard cable
The keyboard is connected to the motherboard with a ribbon cable.
Disconnect this cable carefully. This connector will later be used for the Croissant board.
Remove the metal shielding
The internal metal shield is fixed with screws and tabs.
Remove the screws. Release the tabs carefully. Lift the shield slowly, especially near the power supply.
The shield will not be reinstalled after Croissant is mounted.
Installing the SidecarTridge Croissant
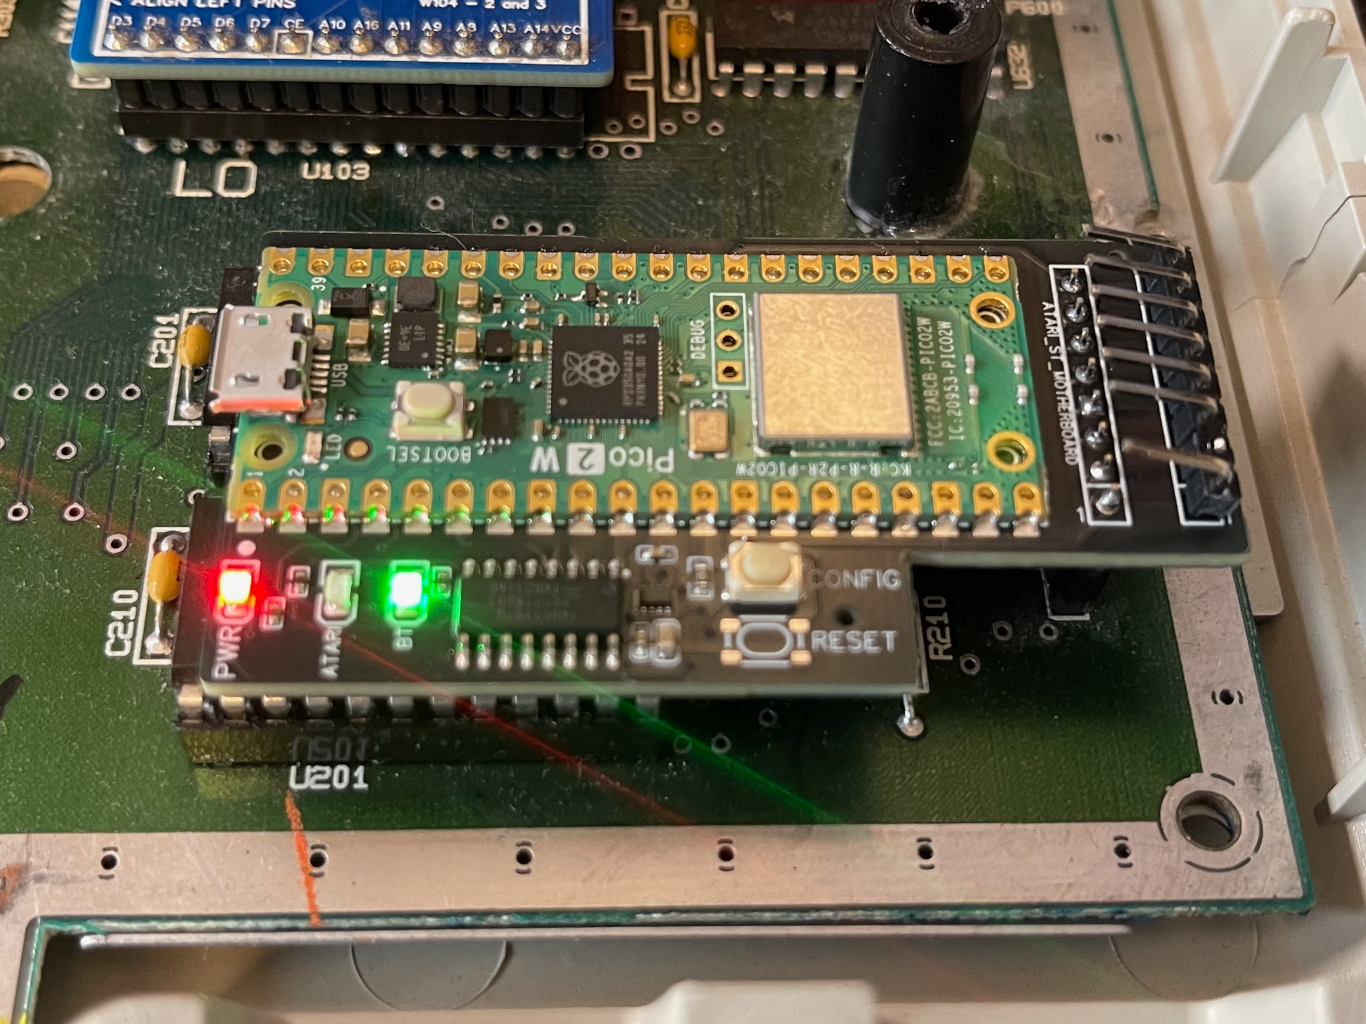
Insert the emulator
Locate the 7-pin keyboard connector on the motherboard.
Insert the Croissant board into the connector.

Make sure:
- pins are aligned
- the board is fully seated
- no pins are bent
The micro-USB connector should face the left side of the computer when looking at the motherboard.
The board should stay in place without support. If needed, use non-conductive tape to hold it during testing.
Dry-run test
Before reconnecting the keyboard, perform a test.
- Leave the keyboard disconnected.
- Power on the Atari.
- Check the LEDs on Croissant.
Expected pattern:
- Orange LED steady
- Green LED blinking
This means the firmware started correctly.
If the computer does not boot, power off and check the connector again.
If the LEDs do not match the expected pattern, see the Troubleshooting section.
Connect the keyboard cable
Power off the Atari.
Connect the keyboard ribbon cable to the Croissant board.
Croissant acts as a pass-through, so the cable must be fully inserted.
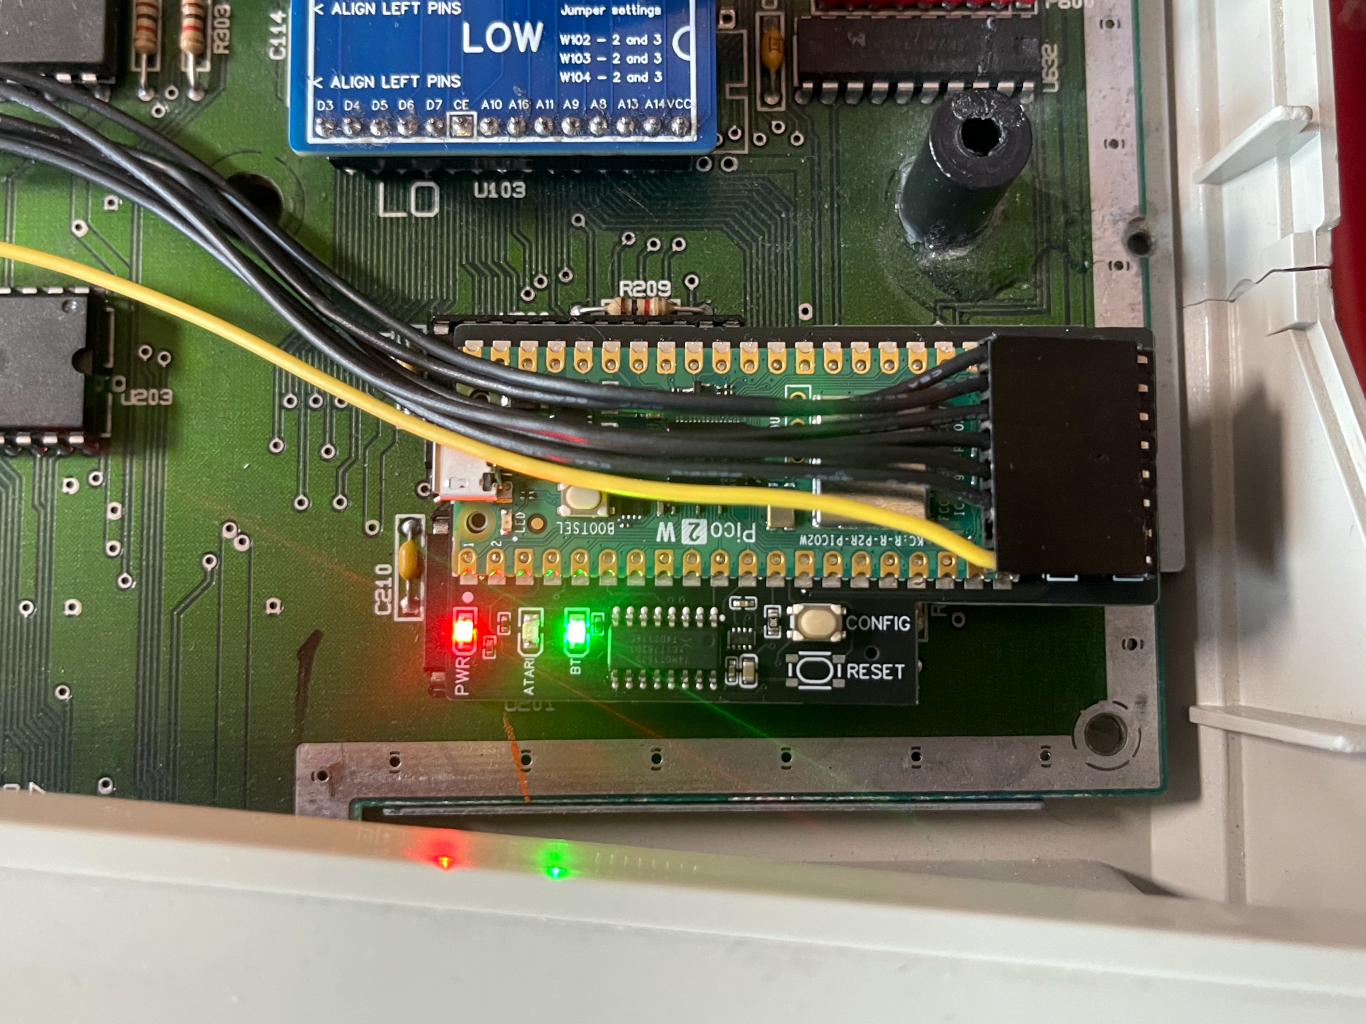
Power on the Atari again.
The keyboard, mouse and joystick ports should work in pass-through mode during configuration.
If the keyboard does not respond, power off and check the cable orientation.
Closing the Atari ST case
Reassemble the computer
After confirming that Croissant works:
- Power off the computer.
- Check that no cables are loose.
- Make sure the Croissant board does not touch any metal parts.
- Close the plastic case.
- Reinstall the screws.
Do not reinstall the internal metal shielding.
The metal shield acts as a Faraday cage and will block Bluetooth and WiFi signals. Croissant cannot be used with the shielding installed.
Before closing the case, verify that the Croissant board cannot short against the shield, the power supply, or any other metal part.