Getting Started
This section describes the first setup procedure for the SidecarTridge Keyboard Emulator.
Use this chapter to verify the hardware, power the device for the first time, and access the initial configuration interface.
Table of contents
Unboxing and inspecting the components
When you receive the device, open the package and verify that all expected parts are present and in good condition.
Croissant
If you purchased the Croissant internal model, inspect the board and verify that:
- connectors are not bent
- the board has no visible damage
- no loose parts are present
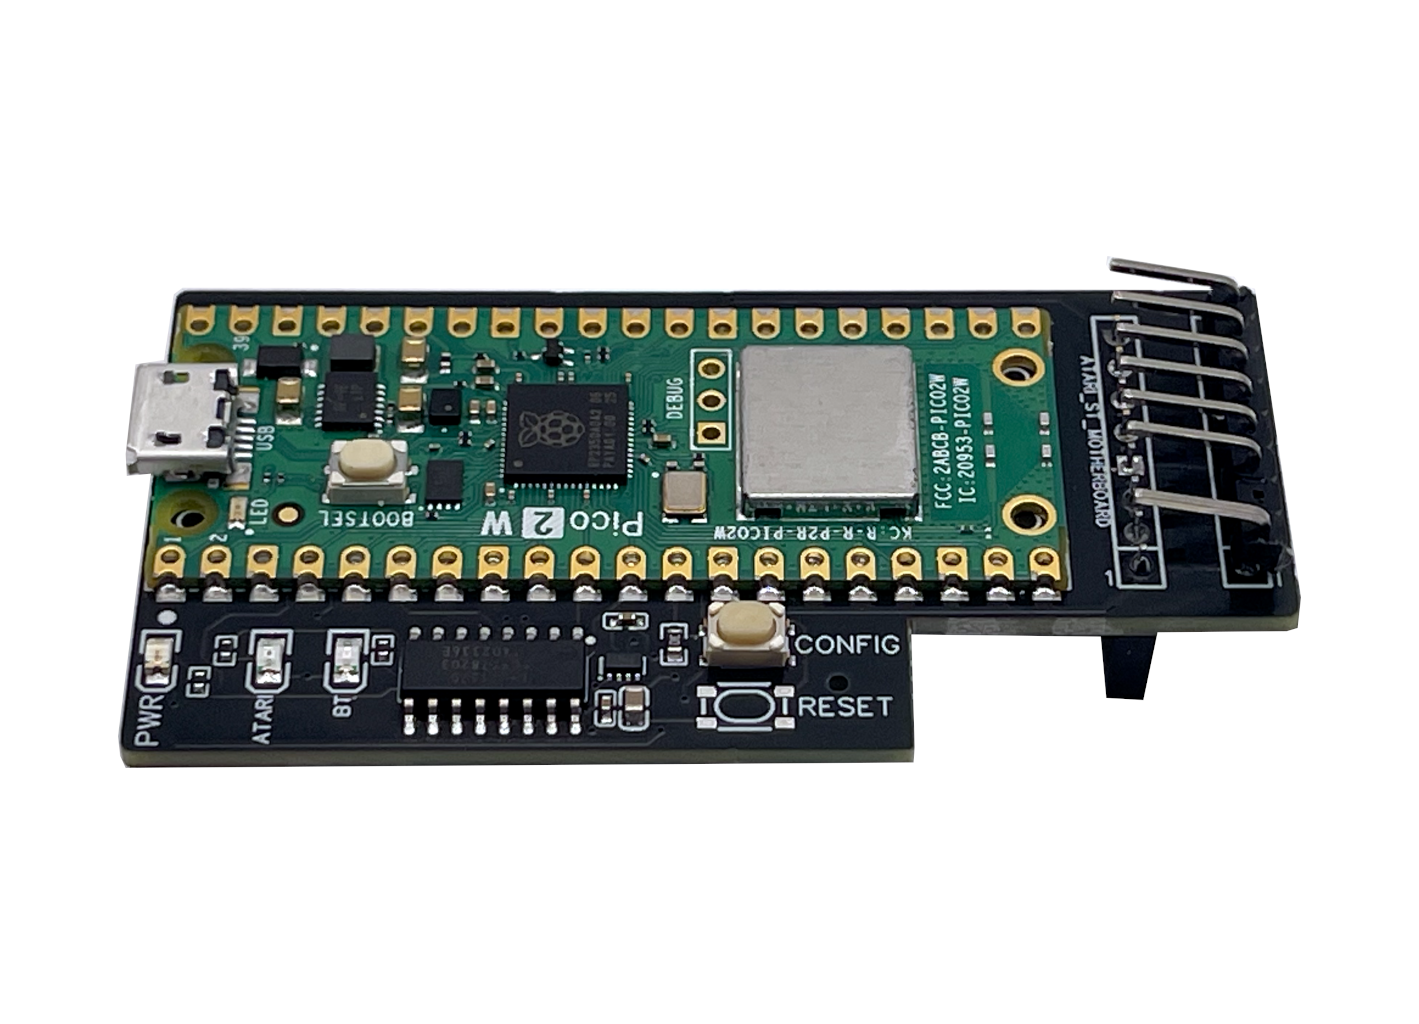
Do this before opening the computer.
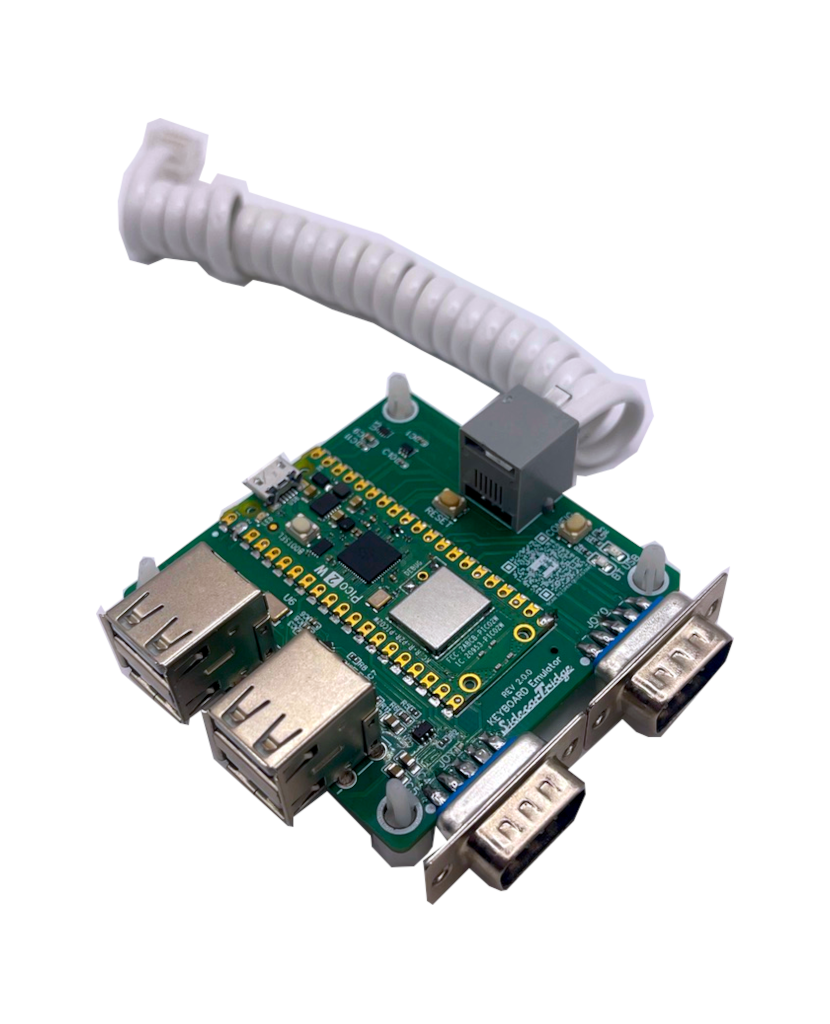
Soufflè
If you purchased the Soufflè external dongle, inspect:
- the enclosure (if ordered)
- the external connectors
- the coiled cable
Make sure the cable and connectors are not damaged before connecting the device to the computer.
Additional components
Both models require a micro-USB cable for firmware updates and initial configuration.
- Croissant and Soufflè use the same micro-USB connector
- the same cable can be used for both models
- the cable is not required for normal operation
The firmware is already flashed on the device.
You can power the device and configure it without reflashing, but firmware updates can be installed later if needed.
First power-on
The first power-on step is used to verify that the device starts correctly and exposes its initial connectivity features.
Powering the device with micro-USB
Connect the device to power using a micro-USB cable.
This first power-on is recommended before installing the device in the computer so you can confirm that the board starts correctly.
LED blinking pattern
At first power-on, the device shows a specific LED pattern that indicates that it is in the initial configuration state.
Expected pattern:
- Green LED: blinking
- Orange LED: steady on
This pattern means:
- firmware is running
- device is in configuration mode
- WiFi station is active
If you see a different pattern, refer to the troubleshooting section in the User Guide.
WiFi station
At first boot, the device starts in WiFi station mode for the initial configuration.
The device creates a WiFi network with the following SSID:
- Croissant → croissant-UUID
- Soufflè → souffle-UUID
The UUID is a unique identifier assigned to each device.

Open the WiFi settings on your computer, tablet, or phone and connect to the network.
Default password:
sidecart
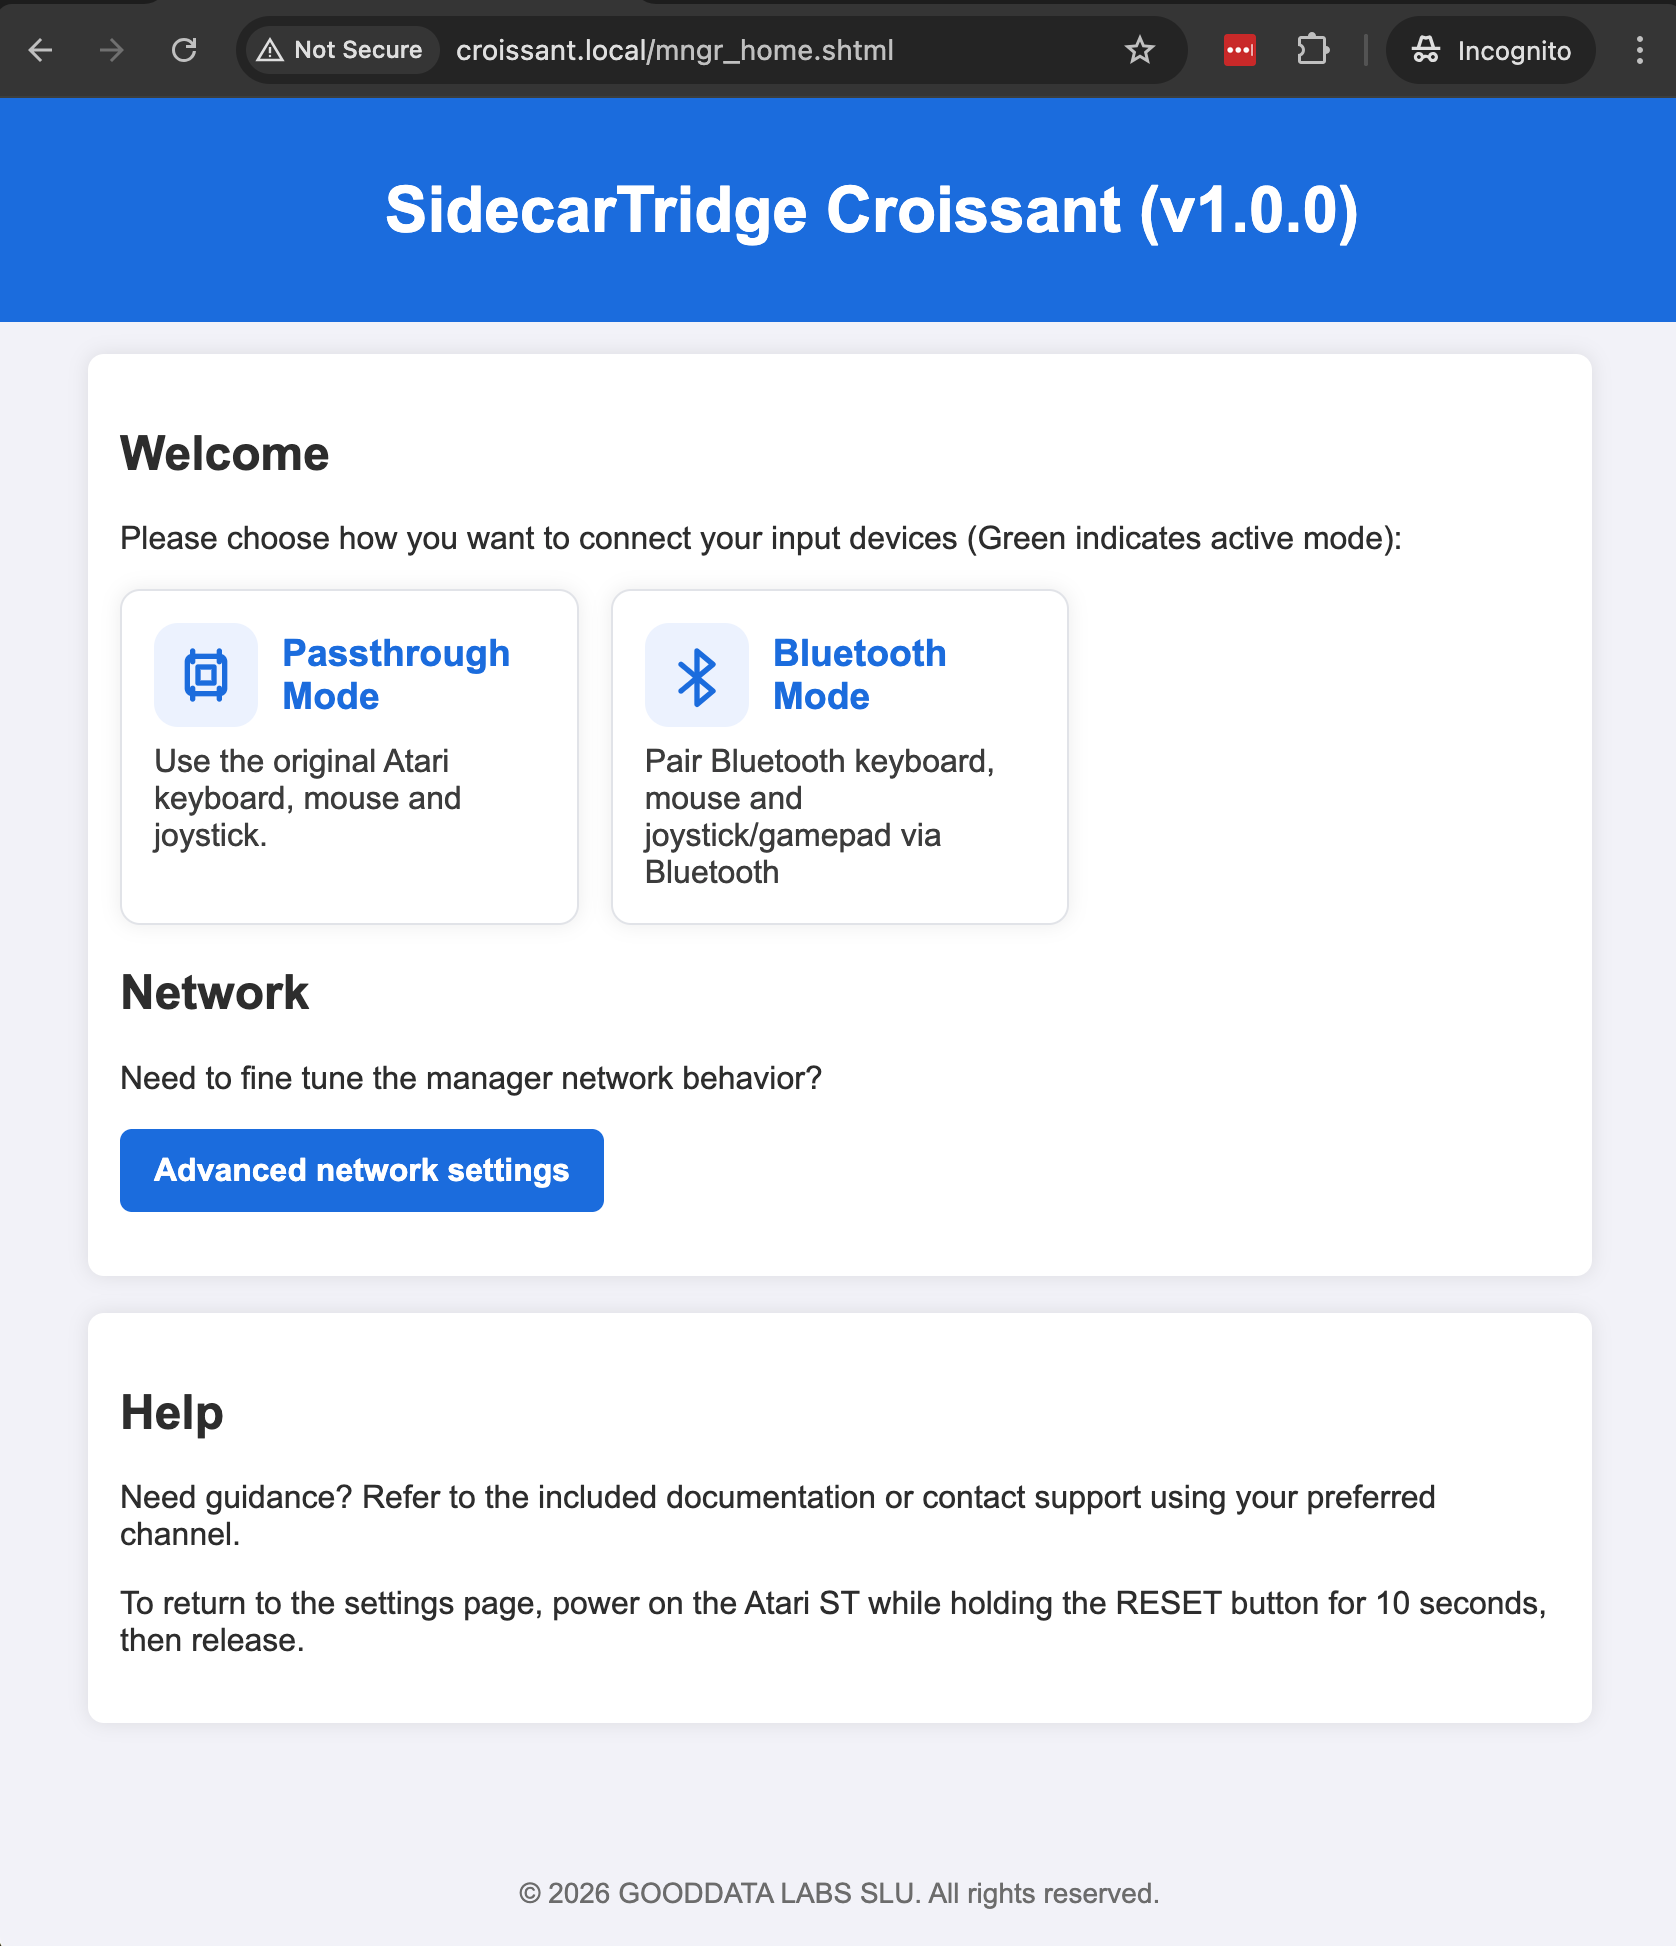
Opening the configuration page
After connecting to the WiFi network, open a web browser and go to:
Croissant
http://croissant.local or http://192.168.1.4
Soufflè
http://souffle.local or http://192.168.1.4
After the page loads, you should see the home screen for your device model.
Croissant home page:
Soufflè home page:
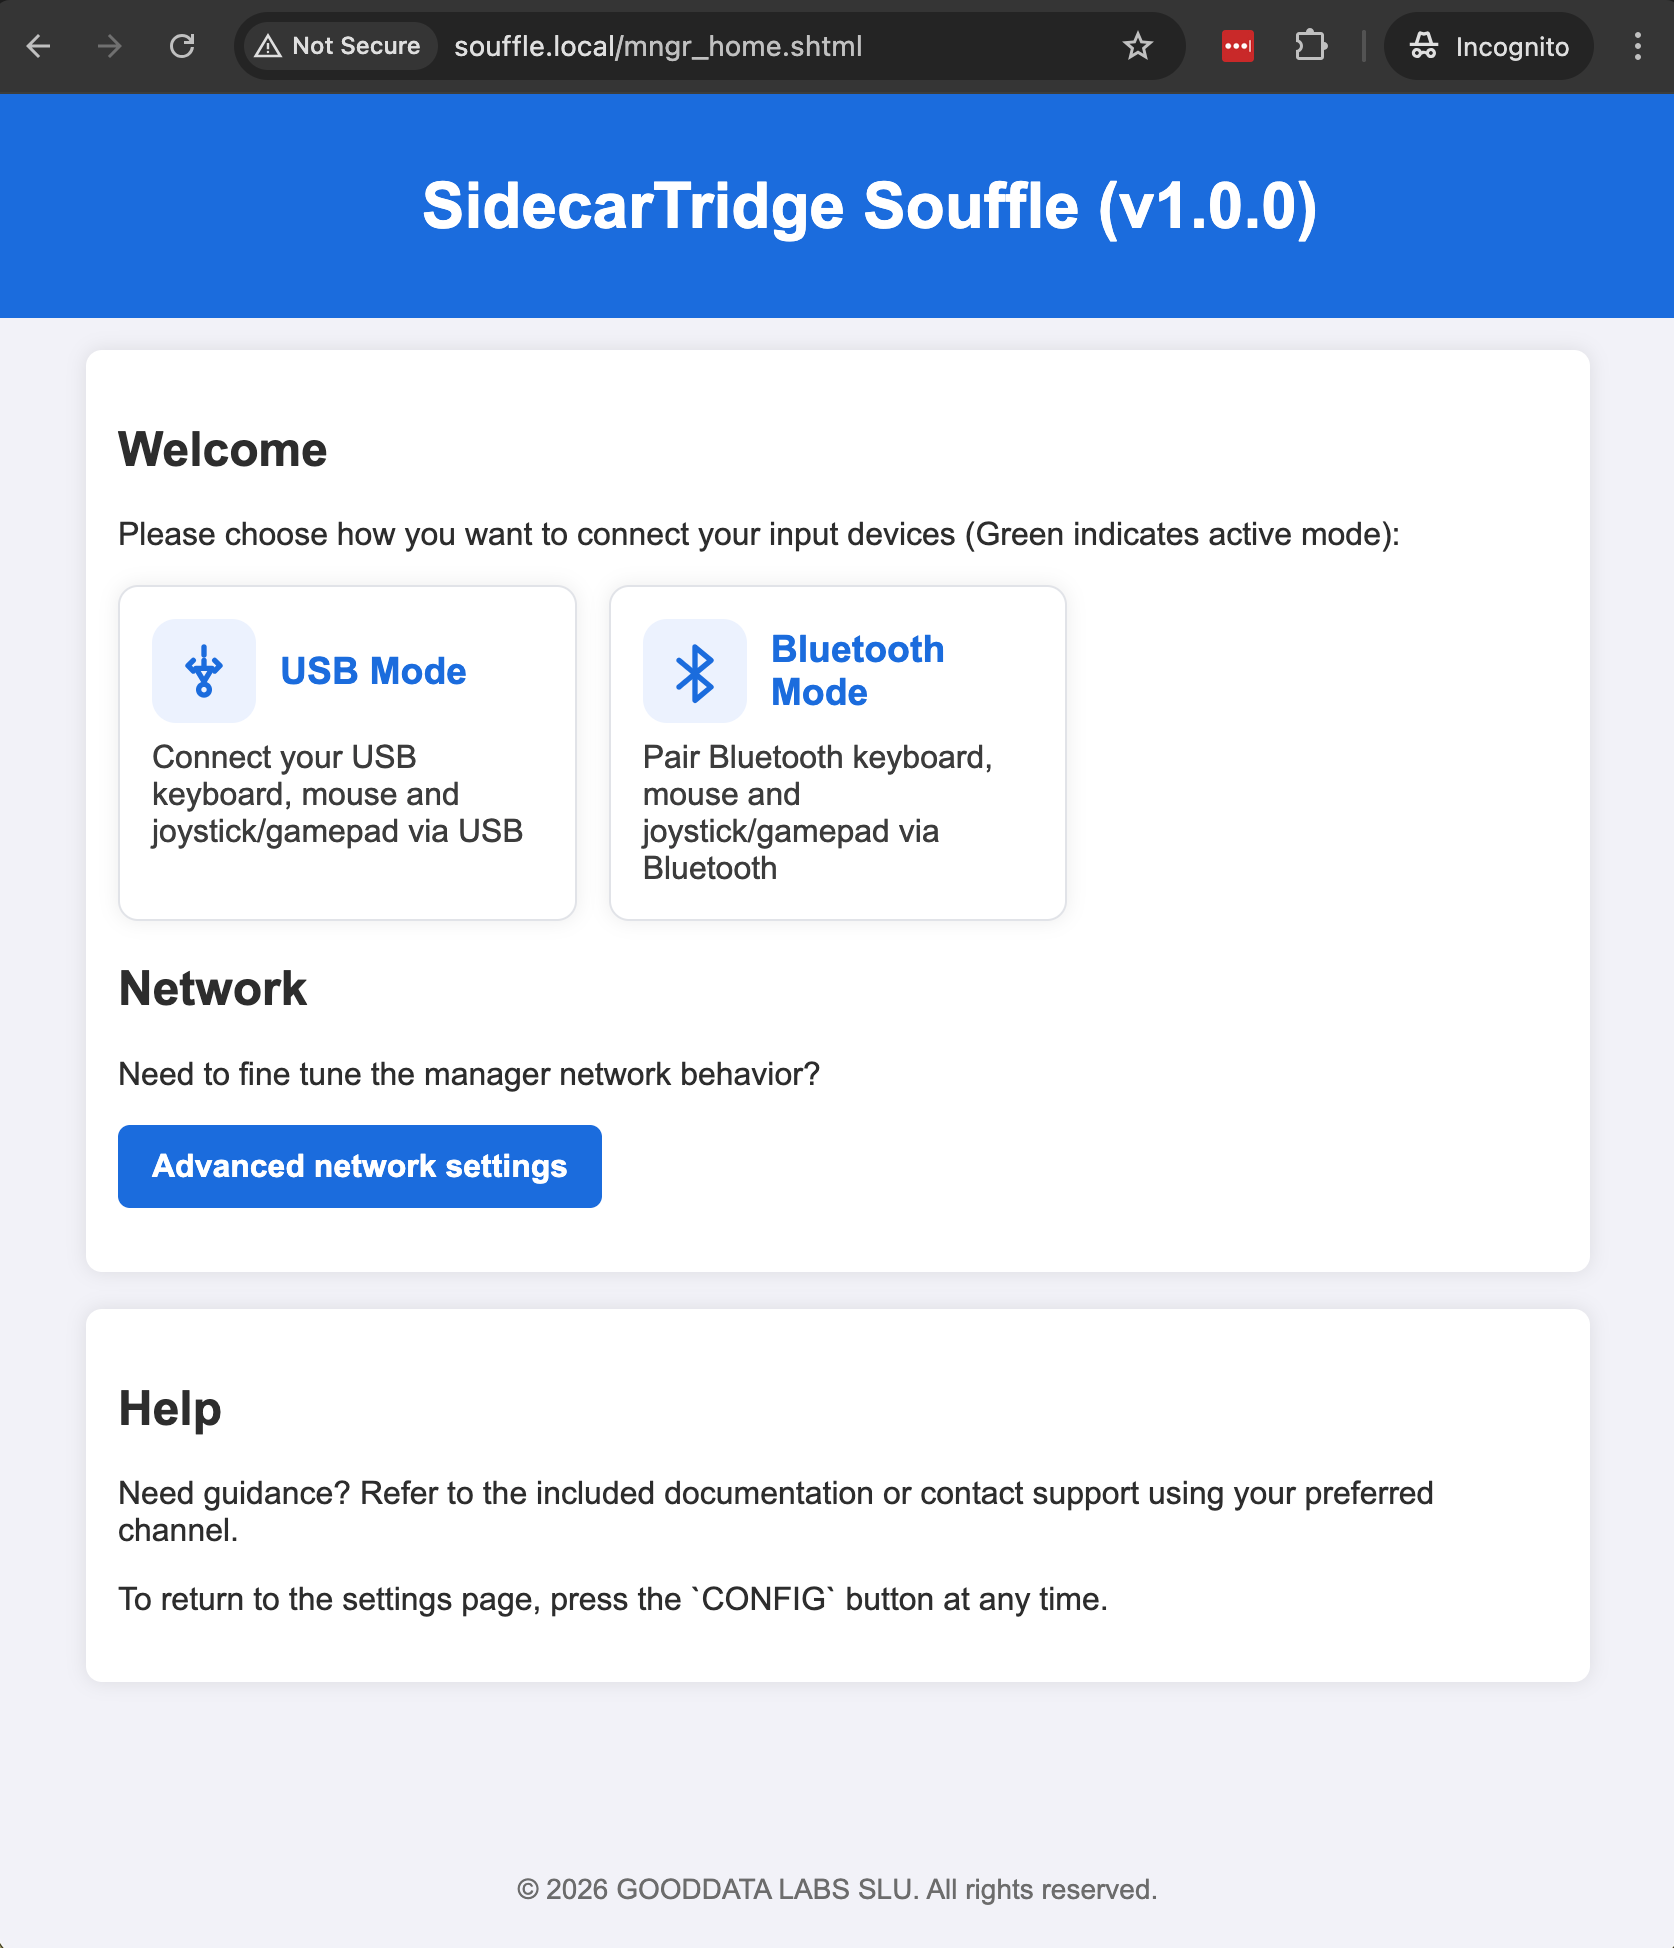
If the configuration page loads, the device is working correctly.
If the page does not load, see the troubleshooting section in the User Guide.
Each model has its own configuration page, but the initial setup procedure is the same.
You can now power off the device and proceed with the hardware installation (if you have the Croissant model) or with the next steps of the User Guide (if you have the Soufflè model).
Croissant installation
Installing Croissant requires opening the computer enclosure.
The detailed procedure is described in the next chapter:
Soufflè installation
Connect the coiled cable to the RJ12 connector on both the computer and the device.
Power on the Atari computer.
Keyboard click sounds indicate that the device is powered but not yet configured.
Continue with the User Guide section.