Hardware Installation
This chapter will guide you through the installation of the current SidecarTridge TOS 256KB Decoder in your Atari Mega ST computer. This installation process only applies to Mega ST computers using the SidecarTridge TOS Emulator carrier board revision 4 and higher. Unlike the discontinued previous versions, this decoder plugs into the MEGABUS connector and does not require soldering on the Motorola 68000 CPU. Once the decoder is installed, you can continue with the installation of the SidecarTridge TOS Emulator as described in the hardware installation guide.
This current installation guide only applies to Atari Mega ST computers with the SidecarTridge TOS Emulator carrier board revision 4 and higher. If you have an older TOS Emulator carrier board revision, visit the discontinued hardware installation page for reference only.
Table of contents
Accessing the MEGABUS Connector
Overview
To install the current SidecarTridge TOS 256KB Decoder, you need to open the Atari Mega ST and access the MEGABUS connector on the motherboard. This version is a solderless design, so the decoder board plugs into the bus connector instead of being attached to the Motorola 68000 CPU.
You will also need the compatible Mega ST carrier board for the SidecarTridge TOS Emulator, revision 4 or higher, because the decoder works together with that board through the supplied 6-pin flat cable.
Tools Required
- Phillips-head screwdriver
- Anti-static wrist strap (recommended)
- Small container for screws
- Insulation tape (optional)
Safety Precautions
- Power Off and Unplug: Ensure the Atari Mega ST is powered off and unplugged from any power source before opening the case.
- Ground Yourself: Wear an anti-static wrist strap or touch a grounded metal object periodically to avoid static damage.
- Work on a Clean Surface: Use a clean, static-free workspace and keep screws and loose parts organized.
Locate the MEGABUS Connector
Alignment and Orientation of the Decoder
The current SidecarTridge TOS 256KB Decoder plugs into the Atari Mega ST MEGABUS connector. The decoder board must be inserted straight and evenly so it sits squarely in the connector without mechanical stress.
When positioning the board:
- Keep the components facing up: The chips and silkscreen on the decoder board should face upward once installed.
- Route the flat cable toward the carrier board: The 6-pin flat cable should leave the decoder board toward the area where the TOS Emulator carrier board is installed.
- Do not force the connector: If the board does not seat easily, remove it and check the orientation again before applying pressure.
The following images show the current Mega ST decoder board on its own, making it easier to identify the connector side and the component-facing top side before installation.
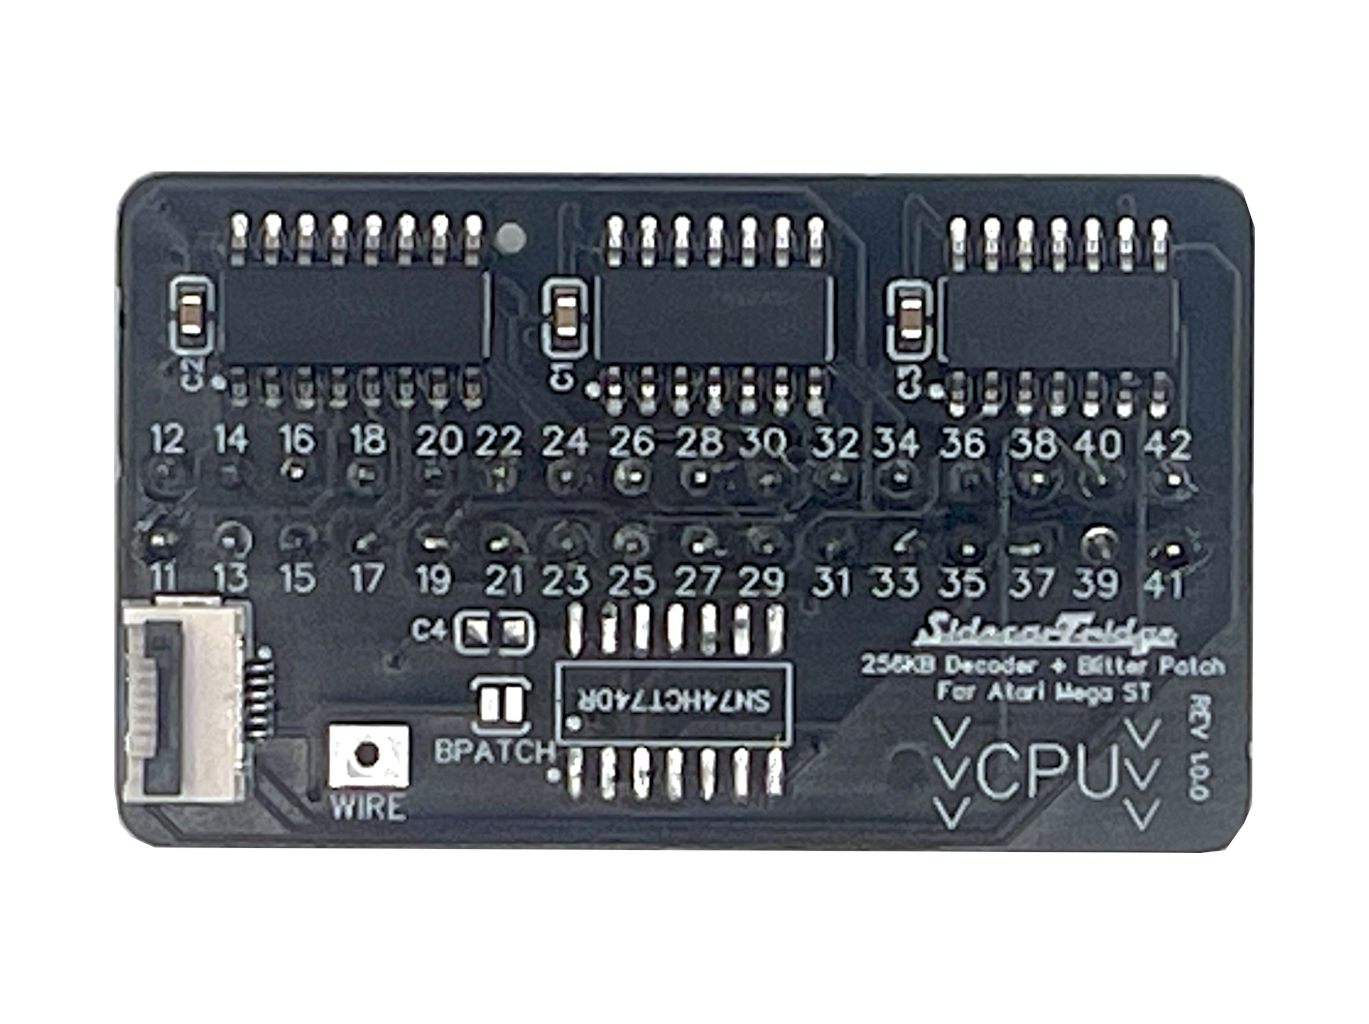
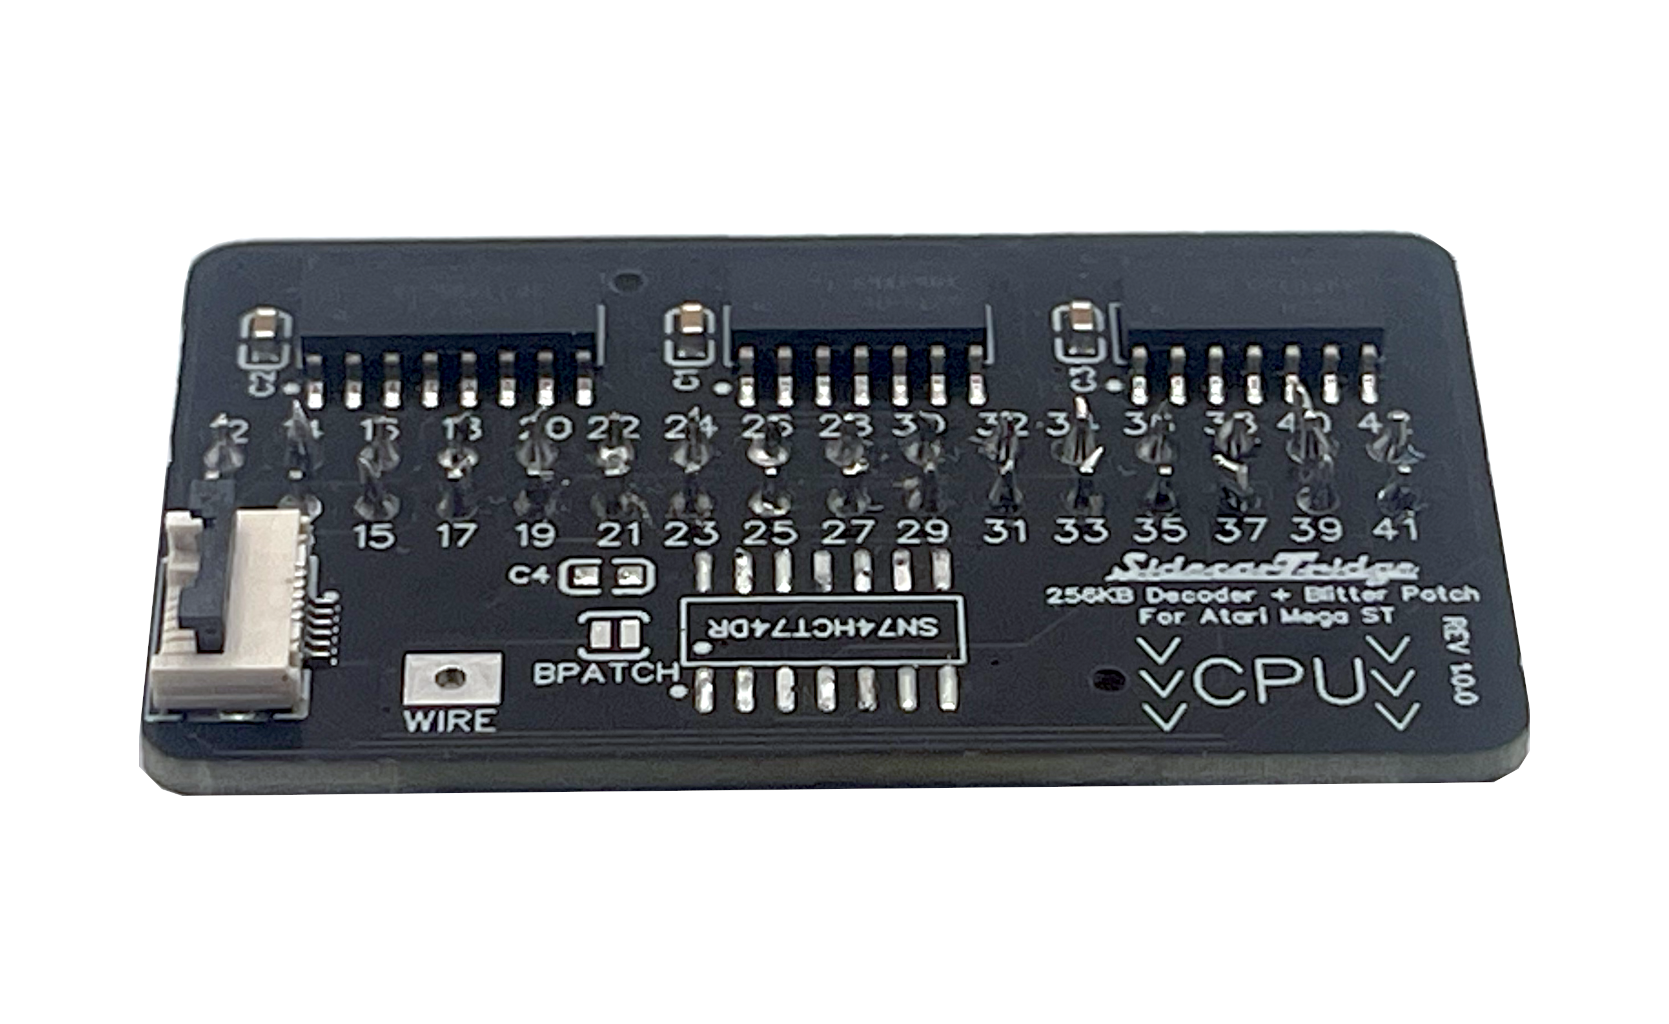
Before pressing the board into place, double-check that the connector is aligned correctly and that the cable will not be twisted or pinched once installed.
Plug the Decoder into the MEGABUS Connector
- Open the Mega ST case: Remove the top cover and metal shielding as needed to gain clear access to the motherboard.
- Find the MEGABUS connector: It is the long expansion connector on the Mega ST motherboard.
- Align the decoder board: The decoder board has a set of numbers printed on the silkscreen that should be visible and facing up when the board is installed. Plug the board into the MEGABUS connector pins 11 and 12 starting from the left side of the connector (when looking at the motherboard with the power connector on the right). The silkscreen also has small arrows pointing to the CPU.
                     + PLUG IN THE DECODER BOARD HERE
                     |
                     |
 2   4   6   8   10  12  14  16  18  20  22  24  26  28  30
[:   :   :   :   :   :   :   :   :   :   :   :   :   :   : :
 1   3   5   7   9   11  13  15  17  19  21  23  25  27  29
                     |
                     |
                     + PLUG IN THE DECODER BOARD HERE
- Press evenly: Apply gentle, even pressure until the board is fully seated.
- Check clearance: Make sure the decoder board is stable and that nearby cables or shielding will not push against it.
The current decoder is a solderless Mega ST design. No soldering is required on the Motorola 68000 CPU.
A Note to Mega ST Owners
Most Mega ST motherboards have a Blitter patch soldered on top of the Motorola 68000 CPU. The current SidecarTridge TOS 256KB Decoder is designed to work with that Blitter patch left in place, so there is no need to remove or relocate it.
Verify the Installation
After plugging the SidecarTridge TOS 256KB Decoder into the MEGABUS connector, inspect the installation carefully before powering on the computer.
Check the following points:
- The decoder board is fully seated and level in the MEGABUS connector.
- The 6-pin flat cable is not twisted, pinched, or under tension.
- The carrier board for the SidecarTridge TOS Emulator is installed correctly in the ROM sockets.
- No part of the decoder, cable, or carrier board can touch the metal shielding.
Do not power on the Atari Mega ST until you have confirmed that the decoder board and cable are installed securely and have enough clearance from the shielding and surrounding components.
Continue with the SidecarTridge TOS Emulator Installation
Once the SidecarTridge TOS 256KB Decoder is plugged into the MEGABUS connector, you can proceed with the installation of the SidecarTridge TOS Emulator as described in the hardware installation guide.
For Atari Mega ST computers, use the compatible carrier board revision 4 or higher that fits the FC-L and FC-H ROM sockets. The decoder board works together with that carrier board to provide access to both 192KB and 256KB ROM configurations.
Connect the Decoder to the Carrier Board
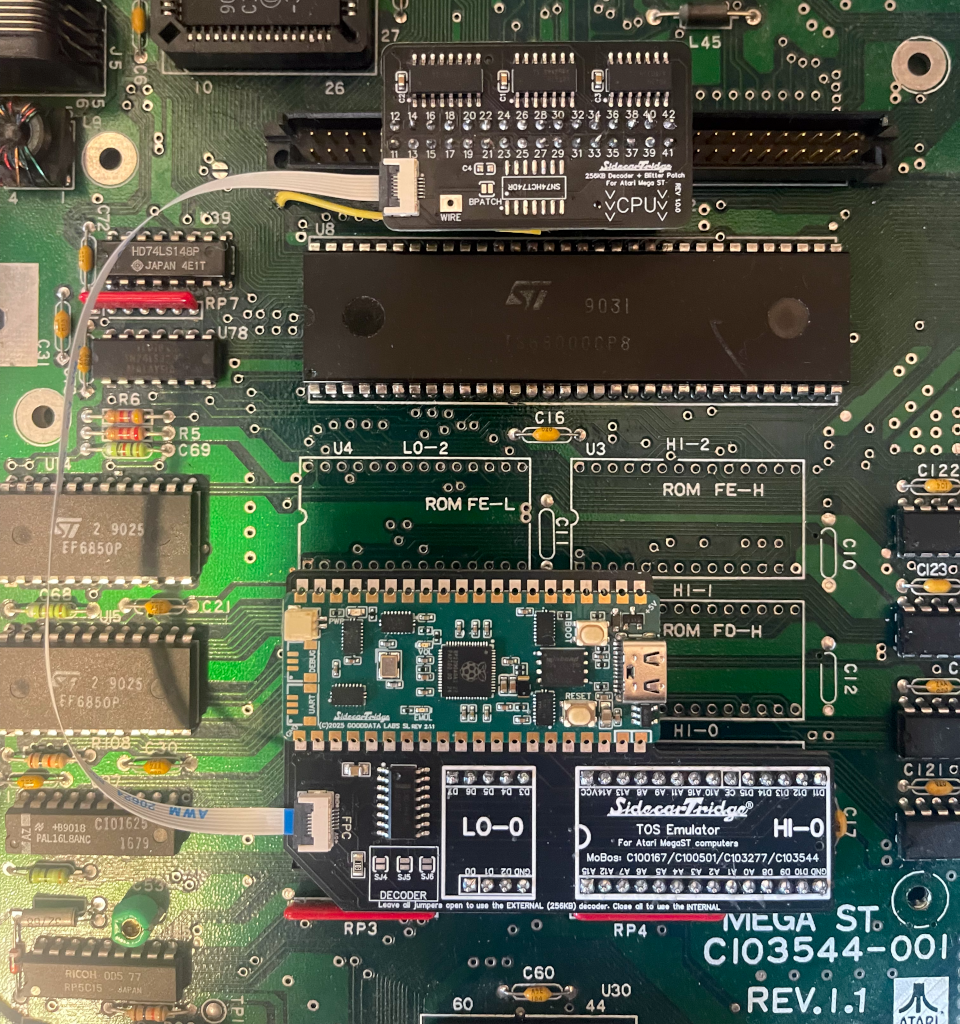
Once the decoder board is installed in the MEGABUS connector and the TOS Emulator carrier board is installed in the ROM sockets, connect both boards using the supplied 6-pin flat cable.
Insert the cable fully into the connectors on both boards and route it so it is not twisted or trapped under the shielding. The cable should follow a relaxed path between the decoder and the carrier board, as shown below with the decoder installed in the MEGABUS connector.
Metal Shielding
The current Mega ST decoder is lower profile than the discontinued CPU-mounted versions, but you still need to check the available space carefully before reinstalling the metal shielding.
If you choose to reinstall the shielding:
- Make sure the decoder board is not being pushed sideways.
- Ensure the 6-pin flat cable is not trapped between metal parts.
- Add insulation tape wherever a board or cable could touch the shield.
If the shielding does not fit cleanly without pressing on the hardware, do not force it.
Power On and Test
After completing the installation of the SidecarTridge TOS 256KB Decoder and the TOS Emulator, power on the Atari Mega ST computer and verify that it boots normally.
If the installation was successful, you should be able to use compatible 192KB and 256KB TOS images with the matching SidecarTridge TOS Emulator setup. If the computer does not boot correctly, power it off and recheck the MEGABUS connection, the carrier board alignment, and the 6-pin cable routing.